Showing posts with label Technical. Show all posts

Monday, April 28, 2014

EyeDefender lets you avoid eyestrain and puts the sparkle back in your eyes
EyeDefender is a freeware rest reminder designed to prevent Computer Vision Syndrome (CVS) resulting from working on a computer for hours. CVS symptoms include eyestrain, blurred vision, delayed focusing, headaches, back and neck aches, dry and burning eyes, light sensitivity, distorted color vision, forehead heaviness, and sore eyes.

Eterlab EyeDefender 1.09
EyeDefenderSetup.exe (185KB)


CVS is impossible to get rid of but you can reduce and even eliminate most of its symptoms. The recommendation is simple – take a short rest break from your computer every hour. The difficulty lies in scheduling a regular break and keeping to it. That's where EyeDefender can help you. It'll remind you to take a break and relax eyes at fixed intervals.


Once installed, EyeDefender sits in the system tray and displays the time left until the next break. When the time for a break comes, the program does one of the following:
Displays pictures in a predefined folder;
Runs the visual training to relax the eyes;
Runs a default screensaver;
Displays a popup timed reminder in the system tray.
EyeDefender can also help you prevent other problems related to computer use, which require a computer user to take short breaks. These problems include Carpal Tunnel Syndrome (CTS) or Occupational Overuse Syndrome (OOS), also known in the USA as Repetitive Strain Injury (RSI) and in Europe - Musculoskeletal Disorders (MSD).

Features:

  • Control the level of eye strain in the system tray
  • Set up the time period for a popup reminder
  • Set up how much time you want to rest
  • Enter the rest mode instantly
  • Reset the counter
  • Stop the counter when you do not want to be interrupted
  • Set the counter to stop automatically after some time of inactivity
  • Four rest modes: slideshow, visual training, screensaver launch, or popup tray reminder
  • Auto-run EyeDefender on Windows start
System requirements:
OS: Windows 98, ME, 2000, XP, Vista, Windows 7

    Keep your Eye from Computer by Eye Defender Free download

    By: Admin on: 1:34 AM

    Thursday, April 10, 2014

    The electronic cigarette came onto the market in 2007 and today the sales have reached over $1 billion a year in the U.S alone. They have proven to be very popular amongst smokers; however we still don’t know just how safe the electronic cigarette is. Scientists did undertake a study internationally and this claimed that the vapour from an electronic cigarette contains anywhere from 9 to 450 times less toxins.


    The various components of an electronic cigarette are typically assembled by screwing or pushing together. There is the LED light which glows during usage and it typically simulates the ember of a normal cigarette when inhaling and exhaling. There is a sensor inside the electronic cigarette which can detect the flow of air when an inhalation is made by the user. This tells the battery to turn on and the heating element is subsequently triggered. Some types of electronic cigarette are turned on and off by the use of a button, which the user presses and holds when they want to inhale the vapour.


    There is a slim line battery and this is typically lithium-ion. The average amount of puffs, or inhalations, the user gets from a battery charge is around 300. The electricity is passed through a material that is resistant, which is typically made from metal or ceramic and this is what transfers the heat.

    The heating element inside the electronic cigarette reaches around 150 degrees Fahrenheit which vaporizes around 0.005 millilitres of nicotine liquid, producing the vapour which is then inhaled by the user, just as they would when drawing on a cigarette. Each of these hits gives the user roughly 90% of the nicotine they would get when they were smoking a cigarette filled with tobacco.


    The nicotine in the electronic cigarette is stored as a viscous fluid; this is generally either vegetable glycerine or propylene glycol or even a 50/50 mixture of both. This contains around 1% nicotine along with flavourings. These can either be fruit, menthol or even tobacco flavour. There are also weird and wonderful flavours to choose from, including anything from Coca-Cola to pina colada, apple pie and anything in between.

    Finally there is the flexible tip which is put into the mouth, through which the user inhales the vapour. This is often made of silicone and in some cases it is designed to look and feel just like the filter on a real cigarette. Electronic cigarettes come in different sizes, just as you would get normal or king-size in tobacco cigarettes.


    There are many accessories on the market to go with the electronic cigarettes, these typically include USB chargers, either cable like or made to look like the box that cigarettes are packaged in, which keep your electronic cigarettes charged up as the box itself is charged first. Other accessories include wallets and neck straps to hold the cigarette and even desktop holders.

    How do electronic cigarettes work?

    By: Admin on: 11:57 PM

    Friday, March 21, 2014

    Android KitKat 4.4, introduced by Google late on last year, brought with it an abundance of useful features, but due to the fragmented nature of the ecosystem, not everybody on Android has been able to enjoy its numerous perks. In fact, only a very small fraction of the Droid-wielding faithful have tasted the chocolatey, delicious new flavor, but thanks to the dedication of a wider community, those on older firmware needn’t miss out on all of the new features. The Immersive Mode, for example, turns the process of using any one of you favorite apps into a full-screen experience, and now, thanks to a third-party app, you don’t need to be on KitKat 4.4 to take advantage.


    Thanks to the endeavors of developer Pieter Pareit, Immersive Mode is no longer reserved only to those on Android 4.4 KitKat. Upon installation of his Play Store utility, you’ll be able to view apps without having to see on-screen buttons or the status bar. Not only does this provide more real estate for the content at hand, but it minimizes distractions, and also, presents a generally cleaner aesthetic with less unnecessary clutter.


    Costing a very reasonable $1.37 on the Google Play Store (£0.82 for folks in the UK), the self-explanatory Immersive Full-Screen Mode will take full advantage of your device’s display real estate, and one of the most impressive aspects is that it doesn’t require root. There’s nothing wrong with acquiring root access, of course, since it opens up a world of unlimited possibilities and is something we actively encourage here at Redmond Pie, but it’s always nice when apps function with minimal hacking involved.


    But while the fact that it works without root is certainly noteworthy, there are one or two limitations. Thanks largely to Android’s own security measures, you won’t be able to use your device’s keyboard in a number of apps when in Immersive Mode, so obviously, it’s only going to be useful in situations where a keyboard isn’t necessary.


    It’s a bit of a shame that the keyboard is hindered in this manner, and takes some of the sheen off what is otherwise a polished experience. Still, if you can see some value in a full-screen option that caters to most apps, be sure to check the link below.

    (Download: Immersive Full-Screen Mode for Android on the Play Store)

    Make sure to check out our Android Apps gallery to explore more apps for your Android device.

    How To Get Android KitKat Immersive Full-Screen Mode On Any Device

    By: Admin on: 3:16 AM

    Tuesday, January 28, 2014

    Lock screens are largely a personal matter. What a person thinks is absolute perfection , another may call ugly and arrogant. We are big fans of minimalist lock screen by Redmond Pie, but this does not mean that there are many people out there who want all the options known to man that is available from that they become your screen. Be able to modify iOS to do exactly what you want , that's what jailbreaking is all about , after all.


    This futuristic and minimalist look that we, the fans are out in force with ConceptLS iOS 7, a lock screen powered Cydget take iOS relatively boring 7 solution and turns his head , instead of offering something that looks and feels much more alive all Apple came up with .


    While the complete overhaul of the iOS lock screen 7 have been around for some time , making ConceptLS stand out from the crowd is that it does not need to be messed with to make function . Often these parameters are accompanied by instructions that involve connecting to the device via SSH, then play with all kinds of files. Nothing to do with ConceptLS , and we are more than grateful.


    As for features, ConceptLS no shortage of those. There is a theme in black and white to begin with the support of BytaFont 2 cases. Weather options include the ability to change where time is checked and changed if it is displayed in Celsius or Fahrenheit. These options are often prime candidates for the need to edit a file on the phone, but not for iOS ConceptLS 7 !


    The activation of the new lock screen is easy, too . Just go to Settings> Cydget > Lock Cydget order, then ConceptLS .


    course, none of this caliber come for free, and ConceptLS iOS 7 is no different . If you want to get into the action , then you must give up to $ 2.99 for the MacCiti repo in Cydia , which in our case is a pittance considering the amount of work that must be done to make this .


    Come on, we shut screen is probably one of the most used parts of iOS - $ 3 is nothing to make it look so good!

    You also like :

    Open Source Jailbreak is open for everyone, here are the details

    Apple iPhone's Free Unlock Codes and reset code 

    Get the lock screen in iOS last 7 Powered iPhone With ConceptLS

    By: Admin on: 7:27 PM

    Sunday, January 26, 2014

    Alt + 0153..... ™... trademark symbol
    Alt + 0169.... ©.... copyright symbol
    Alt + 0174..... ®....registered trademark symbol
    Alt + 0176 ...°......degre­e symbol
    Alt + 0177 ...±....plus-or­-minus sign
    Alt + 0182 ...¶.....paragraph mark
    Alt + 0190 ...¾....fractio­n, three-fourths
    Alt + 0215 ....×.....multi­plication sign
    Alt + 0162...¢....the cent sign
    Alt + 0161.....¡..... .upside down exclamation point
    Alt + 0191.....¿..... ­upside down question mark
    Alt + 1...........smiley face
    Alt + 2 ......☻.....bla­ck smiley face
    Alt + 15.....☼.....su­n
    Alt + 12......♀.....f emale sign
    Alt + 11.....♂......m­ale sign
    Alt + 6.......♠.....s­pade
    Alt + 5.......♣...... ­Club
    Alt + 3............. ­Heart
    Alt + 4.......♦...... ­Diamond
    Alt + 13......♪.....e­ighth note
    Alt + 14......♫...... ­beamed eighth note
    Alt + 8721.... ∑.... N-ary summation (auto sum)
    Alt + 251.....√.....s­quare root check mark
    Alt + 8236.....∞..... ­infinity
    Alt + 24.......↑..... ­up arrow
    Alt + 25......↓...... ­down arrow
    Alt + 26.....→.....ri­ght arrow
    Alt + 27......←.....l­eft arrow
    Alt + 18.....↕......u­p/down arrow
    Alt + 29......↔... left right arrow


    More Short cut click here

    HOW TO MAKE SYMBOLS WITH KEYBOARD

    By: Admin on: 10:14 PM

    Monday, December 30, 2013

    With a greater number of TVs than you could shake a stick at, Samsung’s booth at the CES 2013 was really amazing, and now that the CES 2014 is just around the corner, we are having the same expectations from Samsung this time around. Their booth is expected to be the same this time as well. The company has recently made an announcement confirming that it is going to be bringing out the 105-inch curved UHD TV to CES 2014 which is around two weeks away.


    The TV has been names as the “most curved” 105 inch TV by Samsung and this must be giving a little counter to LG with its own 105-inch curved TV which was announced earlier this week. The 21:9 aspect ratio on this new TV by Samsung is similar to what has been featured on the 105 inch TV by LG. Moreover, the display itself boasts 11 million pixels for a screen resolution of 5120 x 2160.

    Samsung to show 105-inch Curved UHD TV at CES

    By: Admin on: 5:59 PM

    Saturday, December 28, 2013

    If you did not format your flash drive, then check whether the files are not in

    hidden mode. Follow the following steps.


    Step 1: 

    Click on the below link and download the file "AutorunExterminator"

    http://en.kioskea.net/download/download-11613-autorun-exterminator

    Extract it --> Double-click on "AutorunExterminator" --> Plug your flash drive now.

    This will remove the autorun.inf files from your flash drive and also from drives.

    Step 2: 

    Click on "Start" -->Run --> type cmd and click on OK.

    Here I assume your flash drive letter as G:

    Enter this command.

    attrib -h -r -s /s /d g:\*.* 

    You can copy the above command --> Right-click in the Command Prompt and

    paste it.

    Note : Don't forget to replace the letter g with your flash drive letter.

    Now press "Enter".

    Now check for your files in Flash Drive.


    Note:-  cmd it say's "access denied" 

    Chances are, you have to run "cmd" as an administrator. When you click on the start menu, search for "cmd" in the search field, then right click and "run as administrator". Then use the same command (attrib ...) and it should work fine (other than not being able to change permissions for the "system volume information" directory). 


    Make sure the original infected file gets deleted / quarantined or you may end up having the same issues later on.

    Step 3: 

    After that, download the Malwarebytes' Anti-Malware from the below link

    http://en.kioskea.net/download/download-105-malwarebytes-anti-malware

    Update it --> Perform "Full Scan"

    Note : Default selected option is "Quick Scan".

    Good Luck. Share it with your friends :)

    How to remove a short cut virus from your Flash drive or your Drive

    By: Admin on: 5:53 AM

    Friday, December 27, 2013

    A wireless network uses radio waves, just like cell phones, televisions and radios do. In fact, communication across a wireless network is a lot like two-way radio communication. Here's what happens:
    A computer's wireless adapter translates data into a radio signal and transmits it using an antenna.
    A wireless router receives the signal and decodes it. The router sends the information to the Internet using a physical, wired Ethernet connection.
    The process also works in reverse, with the router receiving information from the Internet, translating it into a radio signal and sending it to the computer's wireless adapter.
    The radios used for WiFi communication are very similar to the radios used for walkie-talkies, cell phones and other devices. They can transmit and receive radio waves, and they can convert 1s and 0s into radio waves and convert the radio waves back into 1s and 0s. But WiFi radios have a few notable differences from other radios:
    They transmit at frequencies of 2.4 GHz or 5 GHz. This frequency is considerably higher than the frequencies used for cell phones, walkie-talkies and televisions. The higher frequency allows the signal to carry more data.
    They use 802.11 networking standards, which come in several flavors:
    802.11a transmits at 5 GHz and can move up to 54 megabits of data per second. It also usesorthogonal frequency-division multiplexing (OFDM), a more efficient coding technique that splits that radio signal into several sub-signals before they reach a receiver. This greatly reduces interference.
    802.11b is the slowest and least expensive standard. For a while, its cost made it popular, but now it's becoming less common as faster standards become less expensive. 802.11b transmits in the 2.4 GHz frequency band of the radio spectrum. It can handle up to 11 megabits of data per second, and it usescomplementary code keying (CCK) modulation to improve speeds.
    802.11g transmits at 2.4 GHz like 802.11b, but it's a lot faster -- it can handle up to 54 megabits of data per second. 802.11g is faster because it uses the same OFDM coding as 802.11a.
    802.11n is the most widely available of the standards and is backward compatible with a, b and g. It significantly improved speed and range over its predecessors. For instance, although 802.11g theoretically moves 54 megabits of data per second, it only achieves real-world speeds of about 24 megabits of data per second because of network congestion. 802.11n, however, reportedly can achieve speeds as high as 140 megabits per second. 802.11n can transmit up to four streams of data, each at a maximum of 150 megabits per second, but most routers only allow for two or three streams.
    802.11ac is the newest standard as of early 2013. It has yet to be widely adopted, and is still in draft form at the Institute of Electrical and Electronics Engineers (IEEE), but devices that support it are already on the market. 802.11ac is backward compatible with 802.11n (and therefore the others, too), with n on the 2.4 GHz band and ac on the 5 GHz band. It is less prone to interference and far faster than its predecessors, pushing a maximum of 450 megabits per second on a single stream, although real-world speeds may be lower. Like 802.11n, it allows for transmission on multiple spatial streams -- up to eight, optionally. It is sometimes called 5G WiFi because of its frequency band, sometimes Gigabit WiFi because of its potential to exceed a gigabit per second on multiple streams and sometimes Very High Throughput (VHT) for the same reason.
    Other 802.11 standards focus on specific applications of wireless networks, like wide area networks (WANs) inside vehicles or technology that lets you move from one wireless network to another seamlessly.
    WiFi radios can transmit on any of three frequency bands. Or, they can "frequency hop" rapidly between the different bands. Frequency hopping helps reduce interference and lets multiple devices use the same wireless connection simultaneously.
    As long as they all have wireless adapters, several devices can use one router to connect to the Internet. This connection is convenient, virtually invisible and fairly reliable; however, if the router fails or if too many people try to use high-bandwidth applications at the same time, users can experience interference or lose their connections. Although newer, faster standards like 802.11ac could help with that.

    What Is WiFi?

    By: Admin on: 5:59 AM

    Thursday, December 26, 2013

    Symptom
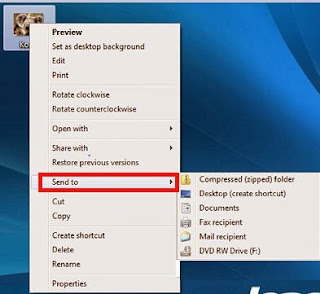
    When right-click a file in Windows 7, there is no “Bluetooth” option in “Send to” menu, see Fig.1. How to resolve it?

    Fig.1


    Affected configurations
    The above symptom may occur on the following operating system:

    Microsoft Windows 7

     Microsoft Windows 8

    Solution
    Optimizing system with an optimizer tool or other wrong actions might cause “Send to Bluetooth” shortcut missed. However, this shortcut could be retrieved by the following methods:

    Method one: Modeless command

    1. Click “Start”,type “fsquirt” and then click “fsquirt.exe” in the result list.

    Fig.2 

    2. Select “Send files”


    Fig.3

    Select the device (Phone or laptop) that you want to send your files to


    Fig.4

    3. Select the files that you want to send


    Fig.5

    4. Click “Next” to connect the received device and send files.


    Fig.6

    5. If there is no any Bluetooth device listed under “Select where to send your files”, see Fig.6:


    Fig.7

    6. Please check whether two Bluetooth-related services are enabled in “Services” Window. ( Press “Win+R” to open “Run” dialogue box, type “services.msc” and click “OK to open “Services” Window)


    Fig.8


    7. If these two Bluetooth services are “Disabled” or  “Manual” in “Startup” type, right-click them respectively, select “Properties” and set “Startup type” as “Automatic”. Click “Start” under “Service status” and then click “OK”. See Fig.8:


    Fig.9

     Method two: Modify “Send to” menu 

    1. Click “Start”, type “shell:sendto”, then click “shell:sendto” to open.


    Fig.10

     In this “Send to” window, you will see all shortcuts displayed in “Send to” menu and there is no “Bluetooth” icon.


    Fig.11 

    2. Double-click “Computer” icon on the desktop and then open C:\\Windows\\System32. Find out "fsquirt.exe" in “System32” file, and this is the Bluetooth program by which the PC sends a file.


    Fig.12


    3. Right-click “fsquirt” and select “Create shortcut”. Cope the shortcut and paste it to “Send to” file. Right-click “fsquirt” in “Send to” file and select “Rename”. You can rename it as “Bluetooth”.


    Fig.13

    4. After finishing above settings, right-click the file that you want to send by Bluetooth and you will see “Bluetooth” from the drop-down list.


    Fig.14

    "Bluetooth" option missing from "Send to" menu in Windows 7 ,Windows 8,

    By: Admin on: 7:13 AM

    Thursday, November 28, 2013

    fake serial problem description:-

    those who use fake key  which may be  downloaded from torrent clients suffer from the message internet download manager has been registered with a fake serial number or serial number has been blocked. idm is now exiting.......

    FAKE SERIAL NUMBER IDM SOLUTION ...
    THERE ARE TWO WAY TO REMOVE THIS PROBLEM-


    FIRST ONE-
    DOWNLOAD CRACK LOADER FROM  ANY WEBSITE.
    NOTE:-SOME TIMES THESE PROBLEM IS NOT FULLFILLED BY ABOVE ONE.


    SECOND ONE-
    THERE ARE SEVERAL STEPS THESE ARE GIVEN BELOW:-
    1. Open the C:\Windows\System32\drivers\etc there is the hosts file.  (first one)
    Please right click and open with notepad. If you can not open with notepad or maybe We Are not Able to edit it. 
    2. Right-click the hosts file than select properties and click the on security button  than click on  user Appears After the new window select the "Users" again and  tick the check box of "Full control".
    3. Click OK in the second window Once done right click the hosts file and open  with notepad .
    4. Once open please copy the data below, then paste the text below 

    127.0.0.1 tonec.com
    127.0.0.1 www.tonec.com
    127.0.0.1 registeridm.com
    127.0.0.1 www.registeridm.com
    127.0.0.1 secure.registeridm.com
    127.0.0.1 secure.internetdownloadmanager.com
    127.0.0.1 mirror.internetdownloadmanager.com
    127.0.0.1 mirror2.internetdownloadmanager.com
    127.0.0.1 www.internetdownloadmanager.com


    5. When finished, do not forget to save, then right-click the hosts file again and select Properties, then check the sign read only. 

          IDM then please open it, get through the start menu, internet download manager.

    6. If "there is still a fake serial number" content just as complete data, tp better fill the serial number first.

    To be content with the serial number is (choose one):

    3J5U-8U66N-D0B9M-54SLM
    EC0Q6-QN7UH-5S3JB-YZMEK      (mostly)
    GZLJY-X50S3-0S20D-NFRF9

    7. So fake serial number is still there will resolve itself and IDM is ready for reuse.

    IDM FAKE SERIAL PROBLEM - New Solution

    By: Admin on: 8:49 PM

    Saturday, November 9, 2013

    Google has launched two new ads hit the Internet , but they are not what one would expect given that the company has a brand new smartphone in stores now , the new Android 4.4 Nexus wearing 5 .

    Instead of pushing his newly released smartphone Nexus 5 ads , Google has decided to give the air to contact the Nexus 7 its line of tablets is the star of the show in two new ads that focus on only two of different using the device.


    The two ads , titled " In Game " and " Center Stage " , both managed by only 31 seconds , but do exactly what they plan to do - to remind that , although all the iPad mini refresh is just around the corner , and there is a pretty nice 7 inch tablet on the market that people can get their teeth. Not a bad choice at all or even with the fancy Retina display New iPad mini and A7 chip considered .

    The reasons for advertising the Nexus 7 before 5 g Nexus , we think the idea that Google is aware of the competition from the iPad mini is as good as any. Lack of Nexus 5 will not be can also be a good reason to spend any money on advertising something that can not do enough available - not that you can sell through increased exposure , if you do not have to sell more, right?

    Whatever the reason for the renewed advertising push Google Nexus 7 should not be rejected because Apple has redefined the small field mini iPad tablet with Android renewed unless simply just not for you . Google ads may somehow try to be changing his mind . And also , the Nexus 7 offers great value for money to those who ask , and is something we can not rule out either when under many cases , taking into account what the Play Store to offer when it is compared directly with iTunes Store.

    We have two ads for viewing recorded , so look for yourself .


    After seeing the ad, guess what, you still keep Mini iPad as a viable option in the new Nexus 7? Share your thoughts with us in the comments section

    Google outs two new Nexus 7 2013 ads , reminds the tablet still exists [ VIDEO ]

    By: Admin on: 11:38 PM

    Tuesday, October 22, 2013

    In some parts of the world where repressive governments monitor impregnable Internet firewalls , Internet web are not the same people to other countries.

    Now , Google wants people of these countries are an instrument to circumvent censorship invisible barriers and defeat. UProxy called , is designed to be easy to use peer-to - peer gateway to be open to the Internet. With uProxy installed , someone in Iran Internet using a friend to contact him or her.


    Although Google announced Monday uProxy in Google Ideas Summit in New York , NY , the tool is not yet ready to be made ​​public, and the Internet giant is not comfortable announce a release date . First, you want to throw a " trusted testers " to improve it and make it safer.

    " The reason that is closed source at the time , the reason we do not open supply just do not want people to start using it for , really , is safe, " said Luke Dixon , the chief engineer of Google Ideas worked on the project .

    When completed, uProxy will be released in the form of a browser extension for both Chrome and Firefox that allows two people who know each other , and have been in contact via chat , Facebook or email, for example, for sharing. your connection

    The user in Iran , for example , would be able to activate uProxy a friend in the United States through chat questions . The American Friend is clicked and the user extension Iranian receive a notification. After you click on the notification and accept the invitation , he or she could be connected to the Internet via secure channels through American friend connection .

    " It's actually a VPN [ virtual private network ] custom " Dixon said in an interview Mashable .

    And it requires a lot of experience to carry out , unlike other commercial VPNs her. Yasmin Green , director of Google Ideas, described during the launch as something only needed " two clicks on my side to avoid . Repressive regime "

    The other difference is that uProxy not depend on a central server or from a commercial supplier , so that will not be easily blocked by a government or other agreement .

    Dixon notes that it is important to remember what uProxy is not and does not. There is no traffic and Tor anonymous , you can not share files and unencrypted, secure communication , these tools and Cryptocat Silent Circle .

    uProxy , which was planted by Google Ideas, but mainly developed by researchers at the University of Washington, is the first instrument of its kind. There are a lot of projects and types of software that promise to bypass firewalls and censorship and weather - Flashlight source project developers have contributed to uProxy by Brave New Software.

    To release uProxy the public , Google will allow Internet freedom organizations , OpenITP that funds and censorship circumvention tools developed to check the code, Dixon said . Then you will see the code, open source release for the public to see .

    By Eva Galperin , Global Policy Analyst advocacy group Electronic Frontier Foundation digital rights , the extremely cautious approach Google is a good sign.

    " If we are concerned about the safety and privacy of our instruments ," he said , "it is important that our instruments are properly controlled and that our tools are open source . "

    uProxy certainly has potential , but it remains to be seen when it will start and how will it work . Internet activists really point to the Haystack warning , another tool promoted to circumvent censorship in countries like Iran .

    Initially it was widely praised and promoted before security researcher Jacob Appelbaum found serious holes in it . The vulnerabilities that people may be at risk .

    The tool was subsequently abandoned and disabled.

    UProxy of Google : A Peer - to- Peer Gate Internet Freedom

    By: Admin on: 9:15 AM

    Saturday, October 12, 2013

    In this current modern technology devices and consumer electronics devices ( CE ), which have battery life and can not survive these devices charging when the battery is reduced . In this state, is seriously disappointing if no power source is available to charge these devices when needed. There should be no power in places like the trains available and there would be an end to our work. There is a solution to this situation Lilliputian Systems .
    Lilliputian Systems launched its new project of mobile power systems , Nectar .
    Nectar is the first portable power device in the world that supplies virtually all devices up to two weeks . A USB 2.0 device can connect to the nectar and loaded with any use of caps . Nectar has it all. Nectar is a device such as a wall so, but in their pockets.

    Nectar is a plug - Less ' lightweight portable device that can power electronic devices such as mobile phones, tablets , MP3 players and Bluetooth headsets, digital cameras and many other devices.
    Some things about Nectar :


    • Freed from the power outlets.
    • It can supply power for CE devices up to 2 weeks.
    • 6 times more efficient than ordinary plugs .
    • Portable and environment - friendly .
    • Recyclable , not expensive , easy to use .
    • Function " Instant Upload .


    Nectar has a weight of 200 g , with a sheath weight of 35 g . If the phone is out of battery , All you need to do is insert the pod , connect the device with the USB cable and go. There, there is no need to worry about charging for 2 weeks. Instant Nectar can also recharge with an option available on the device .


    The end user of Nectar There is no use of an output for providing power to the device , without having to leave your gear here for hours . Users can easily bring your own device in your pocket with the output power at the same time.
    These are the members of Lilliputian Systems . Ken Lezarus - President and CEO , Mike Umana - CFO , Sam Schaevitz - Founder and CTO . TechSoulz would like to thank the Lilliputian System team for the birth of nectar.

    You May also like: 

    Nectar - Portable Mobile Power Lilliputian Systems

    By: Admin on: 5:43 PM

    Friday, October 11, 2013


    Want to try Android on your Windows machine , you get a sample of the latest version of Android for testing or pleasure, or even to develop applications for Android ? Whatever your needs may be , this is how you can try the latest Android in Windows .

    If Android is a mobile technology platform open source , which means that anyone can access images or system code of AOSP (Android Open Source Project) . And that's what you need to run Windows virtually Android .


     Android can be easily virtualized Windows PC . It's as easy as downloading a number of tools , installation, configuration and run . What you need is the appropriate procedure that we will display here , along with some solutions to common problems to solve .

    Recommended reading: 10 Tips to increase the security of your Android device

    Note: This tutorial is written for Jelly Bean Android 4.2.2 virtualize with 64 - bit Android SDK package runs on Windows 8, but the steps will be similar for other version of Android, or Windows architecture or release .

    Requirements
    Let's start by looking through the requirements to run Android in a virtual environment .

    (1)
    Windows PC : a computer with XP or a later version of Windows operating system will work fine , ie XP , Vista, 7 , 8, or later.

    (2)
    Java : Java 6 or later must be installed on the computer , higher, as it is required by the Android SDK Bundle . Install the latest version of Java for the platform.

    (3)
    It requires the latest version of Android SDK package : Android SDK Bundle . Download and extract the file to a folder. You will see a folder named " adt - package - windows - ... " This directory is known as the " Android SDK Folder" for the rest of this tutorial. It contains two folders called " Eclipse " and " SDK" and a file called "SDK Manager.exe " .


    (4)
    Android SDK packages : . Open "SDK Manager.exe " in the Android SDK folder check " Android 4.2.2 (API 17 )" in the SDK Manager . This gives the required packages with Android SDK in a virtualized environment .


    Note : You can reduce unnecessary discharge unchecking sub - package version of Android. Click the expansion button ( > ) next to the Android version . View just this sub - packages:


    • Platform SDK
    • V7A ARM EABI system image
    • Google APIs.

    Click Install Packages ... to download and install the necessary packages .

    Start And Run Android virtual device

    It's time to create your first virtual Android device .

    (1)
    Open "SDK Manager.exe " in the Android SDK folder . Go to Tools > Manage AVDS . This opens the Android Virtual Device Manager .


    (2)
    Click the New button ... ( Top right ) and you the Create new Android Virtual Device ( AVD ) to see the window. Sets the new AVD in accordance with the following settings :


    • AVD Name : Any name
    • Device: Galaxy Nexus ( 4.65 " , 720 x 1280 : xhdpi )
    • Purpose : Android 4.2.2 - API Level 17
    • CPU / ABI : ARM ( armeabi - V7A )
    • Keyboard: Tested
    • Skin: Proven
    • Front Camera : No
    • Back camera: No
    • Memory Options - RAM: 768
    • Memory Options - VM Heap: 32
    • Internal storage : 200 MiB
    • SD card - Size : 500 MiB
    • Emulation Options - Snapshot : Off
    • Emulation Options - Use Host GPU : Off


    (3)
    You can view the list of existing AVDS AVD Manager . Congratulations on making your first Android Virtual Device !

    To start this , select the AVD in the AVD Manager . Click Start , click Start. Wait for the start and then enjoy.


    And there you have Android running on your Windows PC . 'Go Click around and get an idea of ​​the Android interface ( if this is your first time) before moving on to the next section to test Android apps .


    Install App In AVD
    While Google Play Store is the primary source of Android apps , unfortunately , not in the Android Virtual Device ( AVD ) . However, there is a method to install the AVD with Android Debug Bridge (ADB ) applications. It will also show you how to remove . PUA

    Installing an application
    Let's run through the steps necessary to install an application. We use the Mini UC Browser as an example .

    (1)
    With AVD running , download the apk file to UC Browser Mini zoom applications (search for your application , open the page for your application from the search results , click the Download tab on the open page , and click click the option directly Download APK file ) .

    (2)
    Copy the downloaded file to "folder \ sdk \ Android SDK Platform -tools " .

    (3)
    Open the command prompt from the Start menu or the screen and enter :

    cd <Android SDK Folder file path>\sdk\platform-tools

    For example , the Android SDK folder on our test equipment is in " D : \ and \ adt - lightning " , says the command " cd D : \ and \ adt - Bundle \ sdk \ Platform -tools " .

    (4)
    Type " adb start - server " at the prompt. It should inform the daemon started successfully .


    5)
    Type " adb devices" at the prompt. It should be reported as " emulator " a connected device. If no device is reported , then you have not started the AVD. Reboot, wait for the Android home screen and re - type " adb - devices " at the prompt.


    (6)
    Type " adb install < APK < File" in the indicator after replacing < APK < File with the name . Apk ( Android application ) to be installed on the AVD. Eg . Apk in our test system was initially named " ucb - mini.apk " adb install command reads UCB - mini.apk .

    (7)
    Wait while pushing ADB apk file on AVD and installs it. It may take some time depending on the size of the application being installed. When the installation is complete , you must tell success.


    Remove an application
    Within the DSA , go to Settings and then downloaded the application launcher, go to Programs> . Click the application you want to delete, then click Delete . Click OK to confirm rather than wait . That's it.

    Troubleshooting
    Finally, here are some of the problems that can arise and the suggested solutions .

    Internet does not work in AVD.
    Check that your firewall or Internet security program is blocking access to the Internet for a program called " emulator - arm.exe " .

    You no more than 768MiB of RAM for the AVD.
    AVD adjustment greater than 768MiB RAM for Windows will not crash the AVD - memory allocation necessary due to the limitations of the platform. Choose up to 768MiB accidents if you experience problems or errors.

    AVD is running too slow or freezes
    Running the latest Android versions 768MiB RAM can take it easy . In addition , the slower you have many apps installed become the AVD. If you need a fast and responsive AVD , then create a new AVD with a previous version of Android (Android 4.0 ICS or earlier work best ) .

    You can follow us on Twitter, add us to your circle on Google+ or like our Facebook page to stay updated on the latest news from Microsoft, Google, Apple and the web. 

    See Video


    How to install and run the Android OS on Windows

    By: Admin on: 8:40 AM


    Our Team Members

    Copyright © 5G Download | Designed by Templateism.com | WPResearcher.com